These days the majority of painters use acrylic paint in a wet-over-dry technique, or in oils a single layer wet-into-wet. I use fast drying alkyd oil paints in a layered technique based upon traditional methods.
I prepare linen canvas with a coat of acrylic size and two coats of white acrylic gesso. I then use a wash (or veil) of acrylic paint to provide a fairly dark ground on which to work. Because it is a wash, light reflects from the white ground. I begin with one, two or three colours at most, working quickly to completely cover the white ground. The three colours will usually be a phthalocyanine blue, Indian red and magenta. I work in broad bands about eight inches wide, intermixing thin colour. The paint is applied with a flat, bristle decorator’s brush at least two inches wide. Because the paint is rapidly applied, it is possible to intermix it smoothly with so called sfumato (smoke) effects, where colours blend without edges or borders. Usually this first layer is spontaneous. It is just a ground.
I leave this for 24 hours, to make sure that there is no remaining moisture. I work from dark to light, so will usually make a quick drawing with alkyd mixed with turpentine so that it is very fluid. My model for these marks is chinese grass script. The paint will usually be pure black or phthalocyanine blue.
Once these marks are dry — usually within the hour — I can begin to use colour slightly thinned with turps. I block in areas of central tones — reds and red earths straight from the tube, violets, blues, greens or browns all slightly paled with either white or yellow (or both). This layer can be worked either sfumato or wet-into-wet, if I am quick. If that is my intention, I will mix the relevant colours on the palette before I start. Dilute alkyd paint is touch dry within about fifteen minutes. I tend to use a round decorator’s brush (the Stanley Decor or its european equivalent).
I work towards undiluted impasto, gradually using paler tones, and adding flake white if I want more body. I use no additives to thicken paint. Marks will be put on with 1-1½ inch, long-haired Langnickel hog flats (or filberts) while there is still turps in the mix, with stiff paint I use either a painting knife or a Forsline and Starr paint-shaper (generally a two inch, either the hard or the soft). I sometimes only partially mix colour before applying it, so that a mark may include, for example, a cadmium red medium and a cadmium orange. It is important to maintain the clarity of colour, so I do not usually apply colours that produce a muddy mix at the same sitting — reds must be dry before greens are applied, for instance. This principle applies throughout.
Once there is a dry layer of impasto marks, I will put another, generally paler, on top. This gives a scumble effect, highlighting the canvas texture and the texture of the existing marks. This effect was used brilliantly by Rembrandt, who could paint an elaborate lace ruff with a single stroke of one of his unique straw brushes. In the next stage, some of these marks will be glazed, so it is necessary to slightly overwork the surface — put more marks on than will be obvious in the finished picture.
The next layer of paint will be thinned with Liquin medium to a transparent consistency. Subsequent layers will have less paint and more of this glaze medium in. (following the fat over lean rule, for which see craft). These glazes tint the initial veil layer. If I have used a blue and magenta ground, then I might use a violet glaze to draw the two together, and create a more subtle colour range. I put glaze on in marks or patches, using a Stanley Decor brush, or a short, flat or filbert, one-inch hog. In the given example, I might also use a pink glaze smoothing it into the edges of the wet violet glaze. When this is dry, I might overglaze with a magenta and a blue. The glaze will cover some parts of the marks, but most will be left exposed. This unites the marks with the surface. I can only recommend close study of Rembrandt to see how this should really be done.I may add a few linear marks with a fine brush using a highly dilute dark colour at this point — usually not. A few highlights will be added to finish the picture, usually pure cadmium reds or oranges, cadmium yellows mixed down with white, or very pale blues, greens or greys.
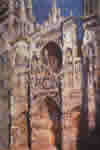
The whole process often takes several years, as I spend a long time looking at paintings to determine what to do next. At other times, a painting may be finished in a week or two, because I am sure what to do (and have the time to do it). At times I use the wet over dry method favoured by Monet. In the marvellous Rouen Cathedral facades the canvases were prepared with vertical strokes (probably in flake white, though perhaps tinted, just as the Impressionists tended to use very pale pinks, greens or violets to reduce reflection from a white canvas). But my underpainting tends to be more elaborate, using swirling strokes, heavily applied.
I do not fiddle much with paintings. They easily become overworked. X-ray examination of Rembrandt’s work shows that he might put the same large, rapid mark in again and again until he got exactly what he wanted. Each failed mark would have to be carefully removed before he could assault the canvas again. Confidence is the basis of powerful art. In Rembrandt’s case it came from brilliant technique, in mine from not worrying about what will happen when the brush hits the canvas. I have the great advantage that the painting happens in the making — I am not trying to conform to any image in my mind, but to create something new. The basic methods of painting are simple, but the principles must be grasped for success and that can take years to do. Or you can just use acrylic paint...August 2004


